This post may contain affiliate links. We are compensated for referring customers to our affiliate partners.
This clicker training guide will walk you through some of the basics of clicker training and help you to get started with your dog. Clicker Training is a fantastic training method that has been around for decades, but has recently seen a huge jump in popularity. There’s good reason for that, too. It’s wildly effective and is used by professional trainers at zoos every day. In fact, it has been used to train just about any animal from fish (yes, FISH!) to elephants to chickens and anything in between. Dogs pick up on clicker training very well since it relies almost exclusively on positive reinforcement. The philosophy behind this clicker training guide is pretty easy to understand. Putting it into practice, as you’ll discover, can take a little finesse and technique. Thankfully the learning curve will be a rather quick one for both you and your dog.
What Is Clicker Training And How Does It Work?
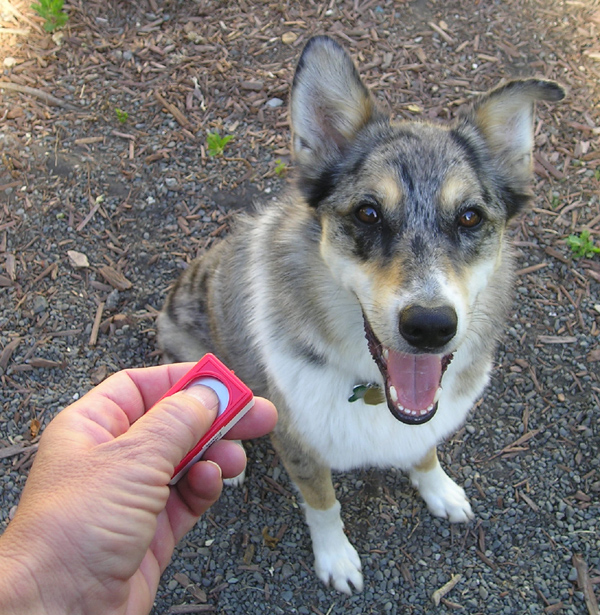
We first need to understand how clicker training works. By using a clicker (I’ll show you what a clicker is in a minute), we are able to effectively communicate to our dog the precise moment when the dog performed a desired behavior. That’s a pretty powerful communication tool to have at your disposal and I’ll show you all sorts of ways you can use that to your advantage later in this guide.
Clicker training uses a type of “classical conditioning” first researched by Ivan Pavlov. Most people learned about the Pavlov’s Dogs Experiment in school. But as a quick refresher, this is an experiment where Dr. Pavlov would ring a bell before feeding a dog. After a while, the dog would begin to salivate when the bell was rung, without any food present yet. The dog was able to comprehend that “hey, when I hear a bell ring, that means food is coming!”
Clicker training is based around the same philosophy. Instead of using a bell, most trainers use a device called a “clicker” which, as you might guess, makes an audible clicking sound. Once the dog has learned that the sound of a click means a treat is coming, we are able to take things one step further. We can use the click to “mark” certain behaviors. In other words, we can tell a dog the precise moment when they performed a desired behavior. A click and getting a treat essentially become the same thing. Your dog will try to do anything possible to make the click happen because that means a treat is coming!
- Recommended E-Book – Clicker Training For Dogs: A Beginner’s Guide
What Equipment Is Needed?
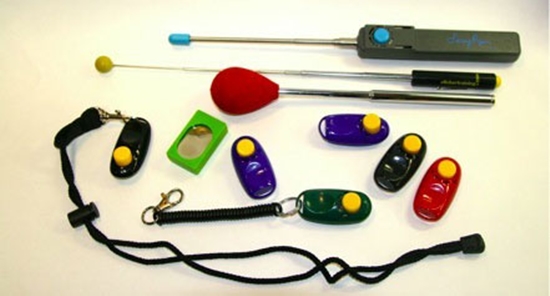
You’ll obviously need a clicker, which you can pick up at just about any pet store. They generally only cost a couple bucks and if you want to save on shipping, they do carry basic clickers in just about any pet store. Technically, you don’t even need to buy a clicker if you don’t want to. You can make a clicking sound with your tongue or use just about any other sound you’d like. It doesn’t have to be a clicking noise. Even saying “YES!” in an upbeat voice will work. But seeing as though a clicker only costs a couple bucks, I’d just save some trouble and pick one up. The sound is unique, very distinguishable, can’t be confused with anything else, and does a great job telling the dog he or she has done a good job at precisely the right time. With clicker training, timing is everything! Here are a few commonly used clickers which can be picked up at pet stores or online, such as on Amazon.
- A Little Tip: You WILL lose your clickers, but they are very cheap, so you might as well buy a pack of them like these.
Commonly Used Clickers For Dogs
Training Treats
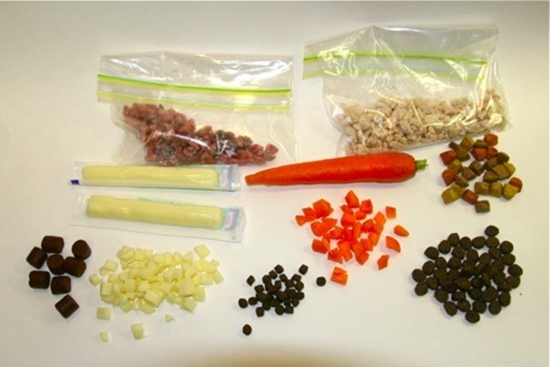
When you first begin clicker training, you’ll need to be quite generous with the treats. Don’t worry, we’ll wean your dog off of treats over time. But for starters, we need a real motivator for your dog and few things motivate a dog more than a tasty treat! Find something really delicious that your dog absolutely loves. Don’t skimp out here. I’ve found that using little pieces of grilled chicken or steak is very motivating for most dogs and those options are very healthy for dogs as well. String cheese is also a popular option when cut up into small peices. Just make sure whatever treat you decide to use is very small – about the size of a pea. That’s all you need. The treats don’t need to be big and we don’t want them to be. We only want the treats just big enough to motivate your dog and usually, that doesn’t require much!
If you don’t want to make your own treats, you can purchase tasty treats like liver treats, beggin strips, or other tasty treats, but be very careful when using store bought treats. Most of them are very unhealthy for your dog as they are high in sodium, artificial sugars, real sugars, preservatives, poor meat sources, etc. In moderation, those treats are ok. Just think of them as potato chips or McDonald’s cheeseburgers for your dog. A little bit is delicious but too much will make you sick and unhealthy. Same goes for your dog. That’s why I prefer grilled chicken and steak. Tasty, yet very healthy!
When teaching a new trick or obedience command to your dog, use a very high motivating food. Once your dog begins to understand the command, you can gradually move down to healthier options and even use kibble.
Effective Treats For Clicker Training
Alright, now you know what clicker training is and you’ve got your clicker and training treats in hand. Now what? How do you put it into practice? In this section, we’ll show you exactly what to do and things are about to get much more fun! Before you can do any sort of training, your dog needs to understand the concept of the clicker. Not only is this something most dogs catch onto within a matter of a few minutes, it’ll be a lot of fun for both you and your dog! Check out the video below to learn how to get started by charging the clicker!
Charging The Clicker – Keep The Energy Level Low
It’s best to begin any training exercise in a calm state of mind for both you and your dog. Eventually, we’ll work in some excitement but for now, keep things calm so your dog can clearly think, analyze, and understand the connection between the clicker and treats. Did you notice how calm both the dog and the trainer were in the above video? You should only begin clicker training after your dog has had some physical exercise. A great time to begin training is about 15 minutes after going for a walk or an extended play session. A hyper, anxious, or excited dog will not process information as well as a calm and attentive dog. It’s perfectly fine to praise your dog and in later training sessions. For starters, though, try to keep yourself and your dog calm. You want your dog to associate the clicking noise with the incoming treat and nothing else.
Keeping The Clicker Charged
Now that you have a “charged clicker” it’s time to really let the training begin! Actually, there’s one last thing you need to know and this is important. Now that your clicker is charged, you need to keep it that way! That means, anytime the dog hears the click, you absolutely must give the dog a treat! Even if you click on accident or clicked for a bad behavior by mistake, you still need to treat the dog. After a while, you can substitute the treats for praise, a toy, or something else the dog likes. In the beginning, it’s super important to keep the click to treat ratio at 100%. No exceptions!
Let The Training Begin!
After going through this clicker training guide, you now have a very powerful tool at your disposal. Once you have a charged clicker, you are able to communicate to your dog in a positive way when your dog does something you like. So if you’re trying to teach your dog “sit”, for example, you can click just as soon as your dogs butt hits the floor. That way, your dog can associate sitting down with a click, which equals a treat! Yup! Your dog will want to sit over and over again as quickly as possible just to get that treat! This same process can be done to teach a dog to lay down, stay, or teach any other type of training.
What To Teach
Now it’s time to get to work and have some fun! Once you teach the first couple tricks, you’ll be able to do things on your own without any instruction from anyone. To help you get you started, though, here are some very basic forms of clicker training:


